Saturday, September 12, 2009

Susanowo WIP part3

So finally time for an update....DAMN YOU SCHOOL FOR TAKING UP MY TIME!!!!
Lol anyway this is what I got done in a day.

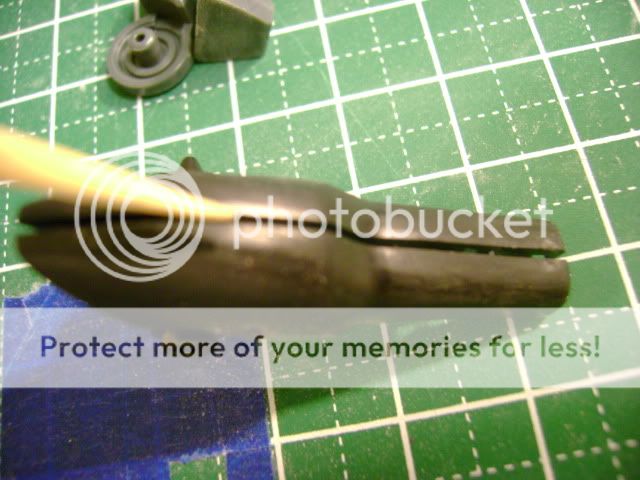
So while removing seams I ran into a small problem
Photobucket
Photobucket
Photobucket

The grey pieces will be stuck in between the parts when I close them up for the seam removal process.
There was two choices
1)Mod it to be able to seperate better
2)Be lazy and paint the part then mask it....

I chose #2 lol
Photobucket

This is the end result
Photobucket

Dodged a bullet there lol

I also washed the pieces and put them into labeled containers to let them dry
Photobucket
I started to get all(most) of the pieces ready for primer on bamboo sticks
Photobucket


After spraying the primer this is the result on the arm
Photobucket

Theres no more ugly seam on the arm...I am so proud of myself lol
next I will start painting(hopefully) and finish this kit up to start on well you know lol.

Susanowo WIP part2

So I was able to squeeze in going to the hobby store before work and bought some of the things I needed :D
Photobucket
some very much needed putty and I was suprised they had this tamiya masking tape(since hobbylobby doesnt really carry all that much tamiya product) I jumped on the chance to buy it lol(pretty expensive stuff)

Photobucket
I bought some chrome silver to paint the cannons and flag face with(I was mad I couldnt find any clear colors that I needed :-/ ) and some plastic cement.


Now this kit has many seam lines placed all over the kit but the one that bothers me the most is the one on the thigh armor
Photobucket

So I applied the putty and let it dry over-night
Photobucket
Photobucket

And after countless minutes of sanding I ended up with this
Photobucket]

It came out ok I think I might have to redo apart where these two "pieces" near the circular part but other then that it looks good.......now to get rid of the rest :ermm: .


The next update should be painting maybe some primer if I buy some(what brand do you guys recomend I was going to pick up this testors grey flat one but decided I should ask for your oppinion 1st)

Susanowo WIP part1

Now im planning on doing some very simple work to this basically OOB(out of the box)
im just going remove seam lines maybe add a small details and paint it thats about it.
Photobucket
those are some thoughts I have on the tri-punisher cannons for some added detail.

These are some spraypaints I picked up at walmart just to try them out
Photobucket
The one on the far left is metallic grey almost looks like gunmetal so I like it.

Photobucket
I also picked up some sandpaper while I was there still have to go and pick up some higher grits at the hobby store aswell as some putty.

Hopefully I can go to the hobbystore soon so I can get started on this guy.

Sunday, August 16, 2009

Mach 5 finished....finally lmao

So I had the pictures in my computer for more then 2 months or so, so now im finally going to show you guys lol
Photobucket
The rims looked short of plain
Photobucket
so I added some of this pigment liner(almost like gundam markers) to add a little more depth
Photobucket
looks better then all chrome lol

Photobucket
I used my trusty silver sharpie to add small details all over the place
Photobucket
Like here in the chassis

Photobucket
Photobucket
finished the interior was sort of mad I had to murder the whole thing with gundam marker but turned out better then what I expected,I also used the pigment liner to detail the seats and interior, I even painted the small screen for the TV blue.

All and all the kit came out good for a rush job here is the completed kit
Photobucket
Photobucket
Photobucket

sorry for the long absence I should be posting here more often.

Friday, June 12, 2009

Cheridum pics

Heres the Pics without the music so you can get a better look at them lol.
Photobucket
Photobucket
Photobucket
Photobucket
Photobucket
Photobucket
Photobucket

Fathers Day Project part1

Well Fathers day is coming up and I wanted to give my dad something he would like.
I thought about what i was going to get him, of course I had to kit the car from his favorite anime:The Mach5 from Speed Racer!


The instructions are a bit different then gundam of course but they are straight foward and in english.
Photobucket


The whole kit is white so theres alot of painting required but mostly in the interior
Photobucket
The famous Mach5 body!
Photobucket

unlike bandai kits this one has alot of excess platic on the trees
Photobucket

heres the all white door panel
Photobucket
I forgot to buy red paint at hobbylobby so I used the next best thing....Gundam Marker!
Photobucket
heres the result...ehh its ok.
Photobucket
I did the same with the seats and the firewall
Photobucket
Photobucket
next I hated an all white floor interior so I used some testors gloss black
Photobucket
heres how it came out...got some red paint on the center console so I have to go back over it later :(.
Photobucket
I wanted to add some bling under the car so I used gold gundam marker on some parts on the bottom and on this box above the wheels.
Photobucket
Photobucket
Photobucket
I also painted the bottom gloss black and later adding some silver details on the "chassis". Well thats about it for part1 stay tuned for part2!